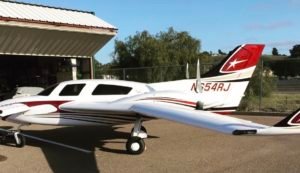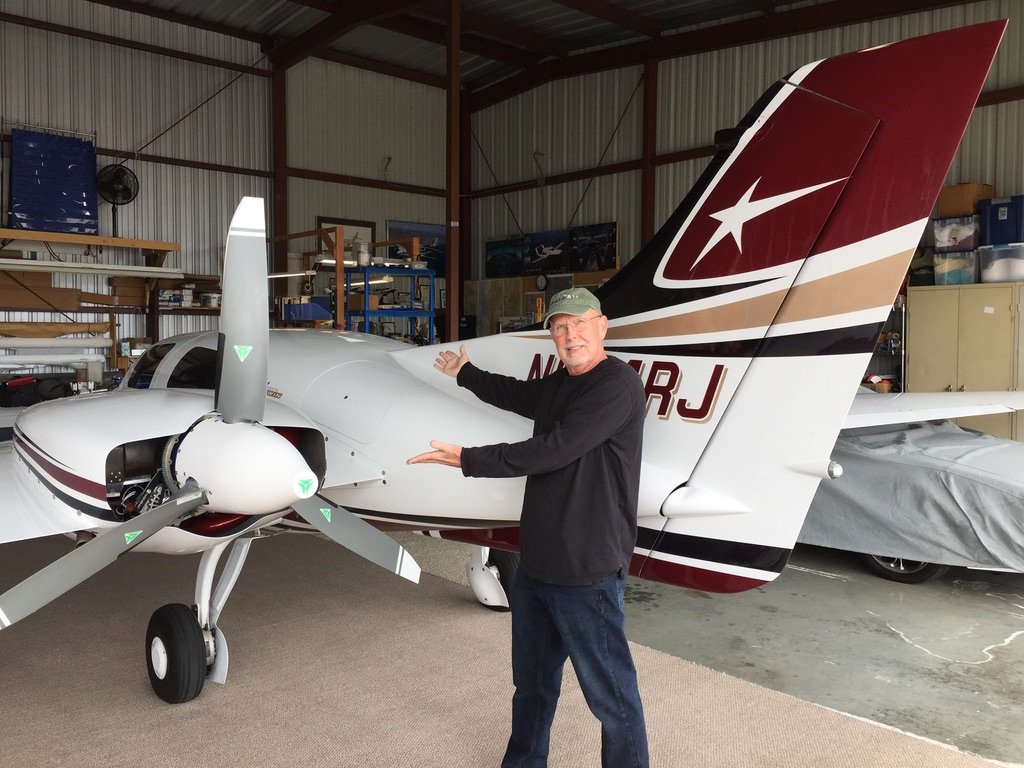
Back home in my hangar!
CONSTRUCTION
See The Build Center to learn about my personal experiences and all the hard work that was involved in building this airplane and getting to that momentous first flight.
The Build Center and The Completion Center (found under “The Journey” menu item) are all about the building of the airplane.
This page is more focused on what I did differently –
things that were “extra”, or “enhancements”, or “improvements”, etc.
ONE-OF-A-KIND
So what kind of twin did I build? Well, I left no stone unturned. I made it the best that I could. It was, and is, the crowning achievement of my life in aviation. I used all of my previous aircraft ownership experiences – flying/owning/maintaining both singles and twins, flying in and designing glass cockpits, and building/assisting with other kit planes. All of that, plus my training in Systems Engineering, my Master’s thesis on the design of glass cockpits, my experiences as both an Air Force and a commercial pilot, and (most of all) my willingness to listen to others.
In this section, I will cover what sets my airplane apart – things that I did that no other twin builder had yet done, and/or things that make my aircraft unique.
The following description of these items is actually pretty long. For an overview of all of these modifications, see Features and Specs. Sorry, it’s still a long list.
ENGINES
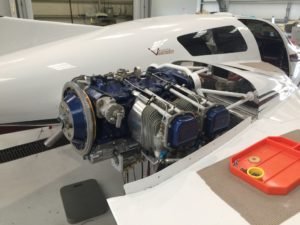
For engines, I started with Superior XP-360 engine kits. They are the excellent choices for this airplane.
They are parallel valve engines. I would have loved to install angle valve engines for a little more horsepower, but their extra power is negated by their extra weight and the need for significant wing and cowling modifications. The wing mod adds more lifting surface, but also more weight and a change in flight characteristics. The best overall choice is to stick with parallel valve engines, and this is what is strongly recommended by the Velocity Factory. Also, if I were building a V-Twin today, I would investigate UL Power Engines. They now have an engine that is powerful enough (220 hp), turbocharged, and full fadec. If their electric props can be feathered fast enough in the engine out scenario, they could be an even better choice.
So I added a few wrinkles to the engines . .
First, I ordered the kits without the Superior crankshafts. Instead, I had Lycoming counterbalanced crankshafts installed. This was to enhance smoother running engines. To further enhance smoothness, I included dual P-Mag electronic ignitions on both engines (so 4 P-Mags in all), Lord engine mounts (softer and, thus, smoother), and I had the propellers dynamically balanced.
I also used a cold air induction system, Silver Hawk fuel injection, Superior 9:1 compression pistons, and 150 amp Plane Power alternators. I chose these lighter weight alternators to power my electric air conditioning system, as well as, my two electric heaters.
Click on the following link to learn more about my custom built engines: Engines
AVIONICS
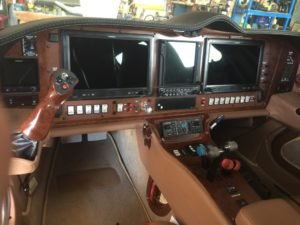
For avionics, I primarily chose Garmin. At the time there were only two viable choices for an experimental EFIS system that would work with 2 engines. I really liked the big, bright Garmin G3X screens, and their numerous other features (which they continue to add). Still do, in fact. I am super happy with them.
Click on the following link to learn all about my Garmin avionics: Avionics
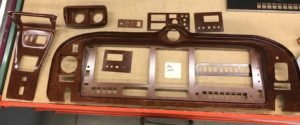
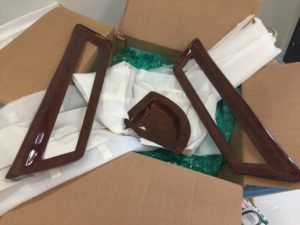
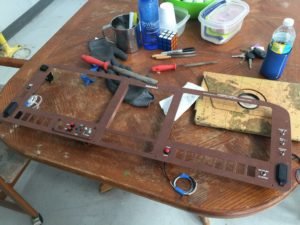
For my panel, I chose a burl wood grain look for the surround, and an Italian leather look for the metal insert. Both were made using the hydro dipping technique. To go along with this burl wood, I wanted some items in the interior to match, so I “dreamed” up the idea of a custom center console cover out of carbon fiber – and I had that hydro dipped that as well. I also wanted a matching wood grain trim piece for the EI Commanders in the overhead panel, trim pieces for the down view ports/armrests for the back seats, and the aluminum trim plates that I made for the aft side of the center console, the overhead switch panel, and the two trim pieces in the aft cabin (that are mounted in my “Twin Towers”). All of these trim pieces were hydro dipped to match. And, of course, so were the control sticks. Scroll down this page for more about the control sticks and the interior design. Creating this “look” and planning ahead was a lot of work. Here are most of the trim pieces and panel ready for assembly.
Central Warning System
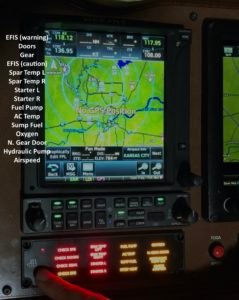
I also pioneered the installation of a Central Warning System that includes a combo Master Warning and Caution Light, along with voice annunciations. As I was one of the very first customers for this product, and certainly the first V-Twin installation, I worked closely with Aero Safety Systems in developing a series of warnings, cautions, and annunciations.
This isn’t my final set of cautions and warnings as the design of this system was a “process”, but it gives you an idea.
This is my current set of warnings . . .
Click on the following link to learn all about my Central Warning System: Central Warning System
EI Commanders and Custom Switch Panel
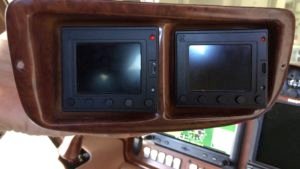
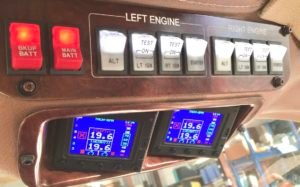
I was also the first to install EI Commanders in a V-Twin. These instruments display the current timing of each PMag, along with other ignition health related items, and include built-in ignition system warnings. I purchased these at EI Commanders.
Once I had decided to go with four PMag electronic ignitions, naturally, I poured over their manuals, and researched them on the web. While these ignitions come with preset timing maps, one of the nice features is the ability to changes the limits. This can be accomplished with a laptop computer and a cable. It can also be done using the EI Commanders. Plus, the EIC’s display exactly what it happening with your ignitions. That can be reassuring as one flies along.
While I “rolled the dice” somewhat when I chose to go with four electronic ignitions (EI’s), I reasoned that I had a twin so I already had a built in backup. You can read more about the features of the EI’s at EMag Air (I have the 114 series), but just note that in order to keep the twin in the air, 3 of the 4 could fail internally, and I could still be flying. As for power sources, the V-Twin has two alternators and a pair of large batteries – so three power sources. If ALL three of those failed, then each PMag will automatically switch to it’s internal alternators – so four more power sources. Therefore, I think it’s reasonable to conclude that this setup is quite redundant.
Click on the following link to learn all about my EI Commander installation: EI Comanders
I also designed and built a custom overhead switch panel. The ones that I saw already installed in Velocity singles and twins just didn’t suit me. I didn’t want to bend my neck so far back to see and operate a switch, plus there is plenty of room on the main instrument panel for switches. No need to try to cram everything on the overhead panel. Instead, I chose a set of overhead switch functions that typically aren’t actuated or needed in flight, but, rather for airplane startup and shutdown. Furthermore, I arranged the switches in a logical left-to-right and right-to-left order. This makes things really easy. For power up and start, begin with the left switch and work your way to the right. Do the opposite for shutdown. Simple. Scott Swing said, “It’s genius!” 🙂
I also used “special” switches for the PMags made by Honeywell. I purchased them from Mouser Electronics. They are three position switches with OFF-ON-TEST (momentary). While the PMags receive power anytime the Battery Switch is ON, the OFF position of these switches act similar to grounding a traditional magneto. Essentially, they send a signal to the PMag “telling” it to not operate, a “kill’ signal, if you like. The ON position simply removes the ground on the “Kill” pin, and tells the PMag to provide ignition.
During run-up, you would also like to know that each PMag is capable of running on both ship’s power and also it’s internal power. In my case, I turn OFF one PMag much like a traditional magneto check (note the RPM drop, engine is not rough, and all EGT’s rise), then I briefly engage the TEST position on the other PMag for that engine. If the engine continues to run, then, voilá, that PMag can be operated both on external and internal power. All four PMags are engaged in the TEST position during engine runup while it’s “twin” is OFF. Fairly easy to do, and reassuring.
By using these OFF-ON-TEST switches, I don’t need the space for four extra TEST switches. Of course, this TEST function can also be accomplished by pulling the appropriate CB. In my opinion, that’s a bit clunky for the V-Twin. I like the switches. That’s a neater solution.
Side Sticks
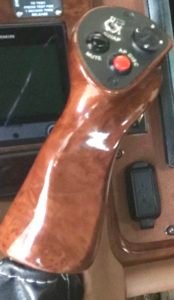
I also installed custom made side sticks with a beautiful and matching burl wood look. These are Pioneer stick grips. They were found at http://www.aircraftcontrolgrips.com, but their web site is no longer active. However, I saw Facebook that someone bought the company. You can check them out at Pioneer Control Grips.
Click on the following link to learn all about my Side Sticks: Side Sticks
OXYGEN
I also pioneered installing built-in oxygen on the V-Twin. In my last airplane, a Lancair Legacy, I gained a lot of experience with the Mountain High oxygen system. I think it is by far the best system out there, and you get much greater range from the oxygen tank as the architecture is that of an Electronic Demand System (EDS). You can read all about it at their web site: Mountain High Oxygen Systems.
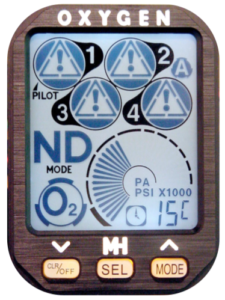
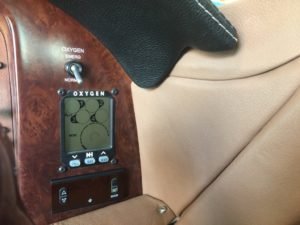
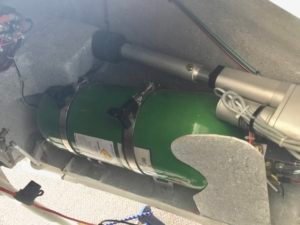
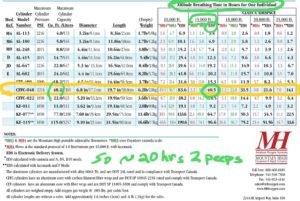
While we are on the subject of Oxygen, people always want to know how long does the oxygen bottle last. Well, take a look at the following chart, and you will see that with this Electronic Demand System (EDS) you will get excellent duration. Essentially, my wife and I can fly across the country and back without a refill. (I refill using my own setup in my hangar. Much, much less expensive.)
Click on the following link to learn all about the custom install of my oxygen system: Oxygen System
LANDING GEAR
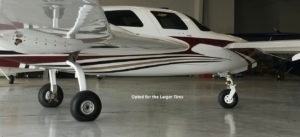
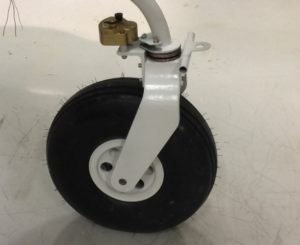
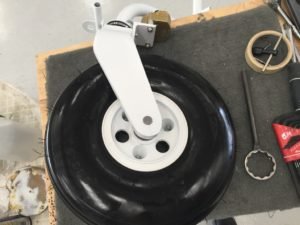
I opted to go with the larger tires. I chose those because of a smoother taxi, possibly landing on grass on some occasions, and for a little more stopping power. This wasn’t free as that adds a little weight and takes away some space for fuel. Still, I’m happy with my choice.
For brakes, I made a couple of changes. First, I moved the calipers to the more natural 10-11 position. This was recommended to me by a Cleveland Brakes engineer. This change resulted in getting rid of the “chin” cutout in the gear doors for the calipers (sometimes called the smiley face), plus I was then able to attach the gear doors at four points instead of three. This four point attachment modification was advocated by Scott Swing, and he recommended that now a max gear speed of 140 KIAS is appropriate. (Normal speed is 120KIAS). Nice. Still, I normally use 120 KIAS anyway as it’s less stress on the gear doors, but it’s nice to know that if I need to get the gear out and make a steeper than normal descent, I can do it at up to 140 KIAS.
I also changed out the brake disks for thicker discs, as every twin I had ridden in had overheated and warped their discs. This causes chatter as one presses firmly on the brakes. Scott also thought that part of the chatter issue could be from discs that were not machined to be perfectly smooth. He recommended I go with the APS Black Steel discs. I got mine at McFarland Aviation Products. So far, so good. Still, I wouldn’t mind a little more stopping power. Down the road, I plan to see if I can find something even better.
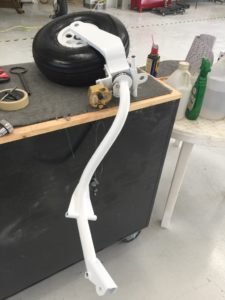
For the nose gear, I knew that I would need a way to attach some sort of tow bar and/or tug in order to move the aircraft by myself. There was no provision for this. Also, the Velocity is not tied down like most airplanes – wings and tail – but rather to hard points on the wings and also to the nose gear. With this in mind, I came up with the idea for a combination tow bar attachment with a provision for a tie down.
When I was flying home from Oshkosh with Scott Swing in a customer’s V-Twin, one of the problems that we encountered was a gear door not closed indication. We didn’t know which door. After some head scratching and guessing, Scott made an adjustment to one of the nose gear door linkages. That fixed the problem.
Anyway, I knew that I would be installing a limit switch for nose gear door indication, but while I was about, I added one for each door. These are inputs to my AH500 Central Warning System (CWS). I will always know which, if any door, has a problem. 🙂
Finally, I have three – count ’em, three! – gear not down warning systems. I had only intended on two, but Garmin updated their G3X software during my build.
So I have the regular old style siren that sounds anytime either throttle is fully retarded and the gear is not down. This old style warning has not proven to be very effective. It seems that it comes so late that most pilots don’t have time to process it, and they land gear up anyway. Still, I hooked up the little siren, just because I could.
Then I set about designing a much more logical and effective gear not down system, and that logic was input to my AH500 CWS. It works quite well, just as planned.
Then, wouldn’t you know that after all that effort, Garmin added a somewhat similar “gear not down” logic to the G3X? To add this new feature, I only had to input an extra set of limit switches to the G3X. The Garmin setup doesn’t need throttle idle limit switches since it knows the power output of the engines. Hence, it warns if you are low, based on AGL, and also have low power (like you have on an approach). Excellent. Just what is needed. And, boy, does it yell and complain. “Emergency, Will Robinson!”. And it won’t shut up until you fix it.
The Garmin G3X also announces 500 feet on approach. I always confirm and announce out loud “gear down”. This is an operationally sound practice.
All in all, I don’t plan to ever forget the gear, but, if for some reason I was that distracted, I have three warnings! Surely, one of them will get my attention!!! 🙂 🙂 🙂
INTERIOR
As I was creating this web site, I looked over my photos to help me remember all the changes or mods that I made to the airplane. When I got to the interior, I was surprised at just how long the list is. Keep reading. You will see what I mean. 🙂
Interior enhancements include:
- Inflatable Door Seals
- Less noise. Less cold air. First to use these seals and this hardware on a V-Twin
- Down view ports
- Back seat passengers have a better view
- Center console
- A single trim piece that is essentially a cover that encapsulates all items forward of the arm rest. This gives a nice, complete look
- Arm rests
- Modified the front seat arm rests to give more hip room while still matching up perfectly with the side sticks
- Overhead panel
- Custom made overhead switch panel that also houses the EI Commanders
- Overhead plenum
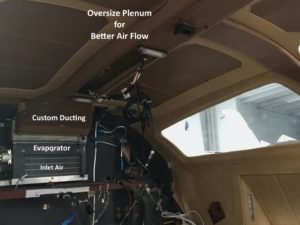
- Modified the overhead plenum to provide more air flow, as needed by the air conditioning system
- To not restrict the additional air flow, installed oversize eyeball outlets
- Custom control sticks
- “Star” embossing on the doors
- Embossed the interior door panels with my wind swept star that is also prominent on the tail and winglets
- Headrests for the bench seats (More on this in The Build Center)
- Customized the back seats so that they would have the same shaped headrests as the front bucket seats
- Document pouch
- Added nice, clear document pouch on the vanity panel to contain the required paperwork items necessary for flight
- LED cabin lighting
- On the overhead plenum; dimmable
- In the fuel view ports
- In gear down view port on the vanity panel
- Gear view port with LED light
- A visual view port to confirm main gear down
- Map lights
- Pilot and copilot map lights, each with a switch
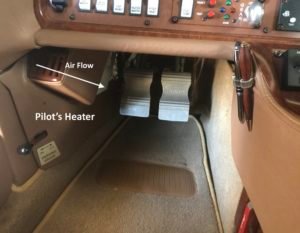
- Dual Electric Cabin Heaters
- Individual digital controllers
- Seat heaters
- Dual heaters, control on the center console
- Dual heaters, control on the center console
- Twin towers
- Matching interior trim pieces (boxes) behind the rear seats
- Cover the aileron push rod system and ELT and its antenna
- Handy location for the headset jacks, both Bose and regular, speaker, entertainment #2 input
- Hand grips to aid getting in and out of the aircraft
- Vanity panel with sound deadening
- Adding embossing, gear down view port, and sound deadening on the aft sides
- Sound deadening
- Besides the sound deadening material on the vanity panel, adding a sound deadening ceramic coating on the aft bulkhead, front and back. Also brought this coating forward on the sides of the fuselage up to the aft edge of the vanity panel
- Hydro dipped trim panels
- Burl wood look
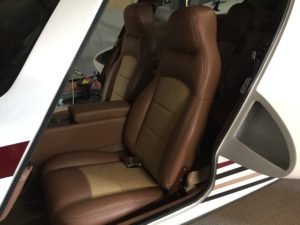
- Synthetic leather interior
- Used contrasting colors of this cloth, and two different shades of contrasting paint, all from the same pallete
While still building in the Build Center:
- Built the “down view” ports. This had to be accomplished before the fuel tanks were made.
- Made the bench seat headrest modifications while in the Completion Center, as this is where the seats are assembled.
- Made the mounts for the electric heaters while I still had good access.
Click on the following link for more pictures and info about the custom interior: Interior
EXTERIOR
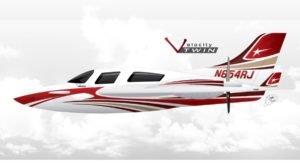
I made a number of enhancements to the exterior. The thing that probably stands out the most is the custom paint job. Still, I changed the way the winglets are installed, added LED lights, fitted the nose hatch with a remote release, made tie down hard points, and so on.
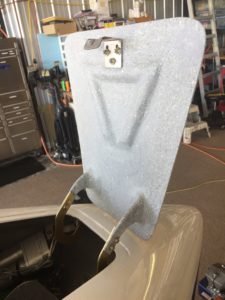

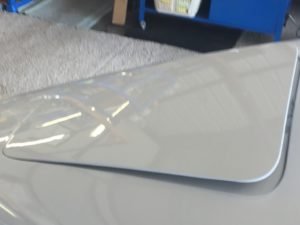
Click on the following link for more on the custom exterior: Exterior
ELECTRIC CABIN HEAT
The electric cabin heat includes dual heaters, dual controllers and temp sensors, and a Master Heater switch (for safety).
Click on the following linke to view the electric heaters project: Heaters
I also added seat heaters to the front seats. Click on the following link to view the seat heaters project: Seat Heaters
AIR CONDITIONING
